Other Projects
Nextcloud: Microsoft 365 and Google Suite Replacement
Nextcloud is a completely free and open-source solution to substituting
Microsoft 365 and Google Suite. Imagine Google Drive, Calendar, Notes,
Photos, Meet, and more, but completely self-hosted, secure, and truly yours.
With Nextcloud,
I host my own Nextcloud server at alexandria.turibiusrozario.com that I regularly use for all personal files and activities. This is done using a Raspberry Pi 4, an external hard drive, and a domain. Below is a guide on setting Nextcloud up. This guide is tested and true as of 2025-08-29.
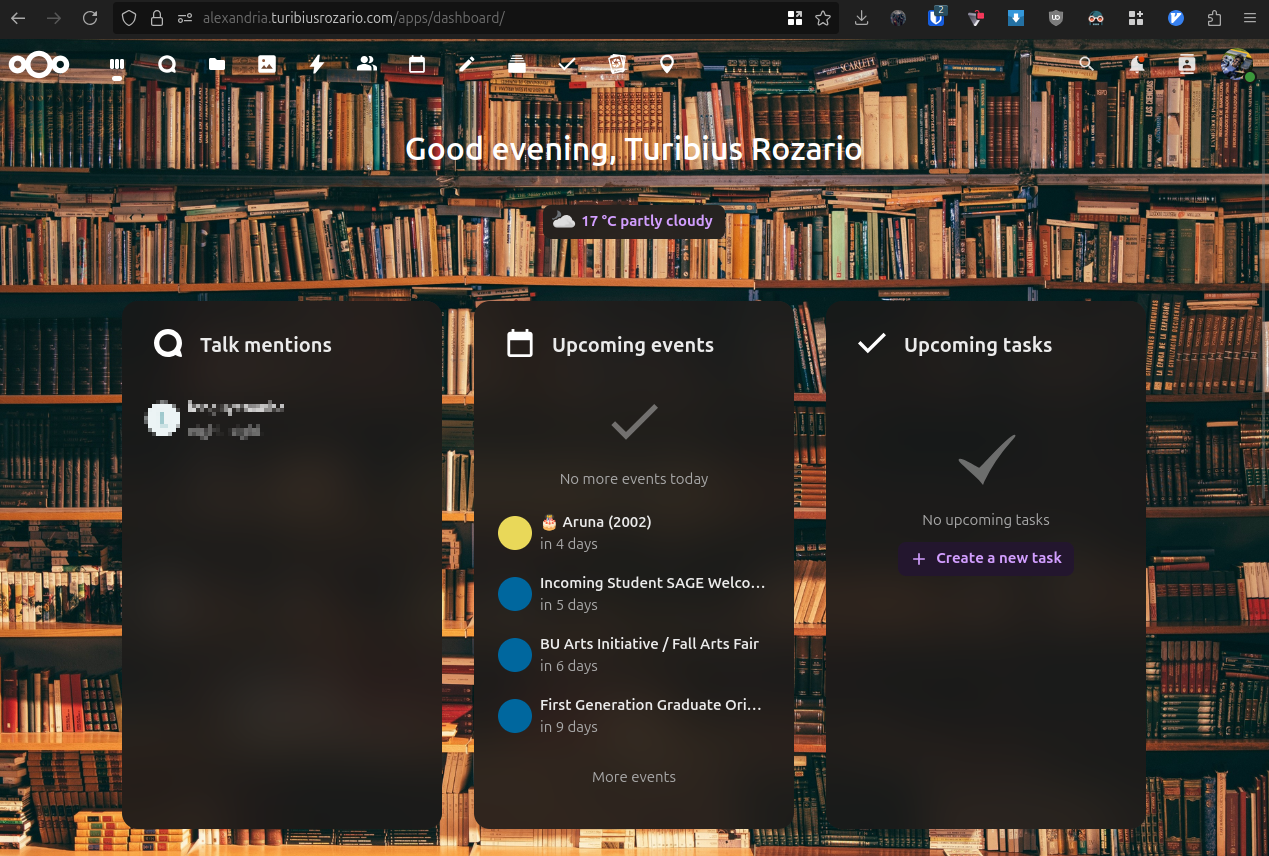 My Nextcloud dashboard
Step 1: Getting all the parts
Purchase a small computer. This can be a Raspberry Pi 4 or 5, with 8 GB RAM. Lower-cost alternatives are available such as Orange Pi, as well as more powerfull options such as mini computers. In general, if you plan on having lots of computations such as AI and video recording, aim for a mini computer. You can also use an old computer as a server, so long as it can run Linux (non-Linux works, but that is beyond the scope of this guide). If you are intending to use a Raspberry Pi or similar, also purchase a fan for cooling.
My setup utilizes a Raspberry Pi 4 Model B with 8 GB RAM, with a cooling fan attached. I use a fast phone charger to power the Pi.
Warning: If you use a Pi or similar, always power it with an appropriate power supply. For the Pi 4, a 5V 3A (or higher than 3A) power supply is required.
If you are NOT using a Raspberry Pi or similar, you have to tweak certain aspects of this guide!
Purchase some memory. This can be a simple microSD card that is 128 GB and above. If you plan on hosting a lot of files, particularly videos, purchase a 16 or 32 GB microSD card along with an external hard drive of your choice.
My setup utilizes a 32 GB microSD card (a 16 would have been fine) with a 1 TB external hard disk.
Purchase a domain. Go to porkbun, make an account, find a domain, and purchase it. Ensure that the renewal price is not too high, and avoid top-level domains (tld) that do not offer WHOIS privacy. Top-level domains are the ".com", ".net", ".us", etc. that you would see websites end with. WHOIS allows anyone to identify a domain owner, and WHOIS privacy prevents that. This is important since you have to use your phone number and or address to purchase a domain; with WHOIS privacy, you keep this information safe. Avoid a tld such as ".us", which does not allow WHOIS privacy.
For my setup, I purchased "turibiusrozario.com" for $11. I could have purchased "turibiusrozario.us" for $6, but that would publicize my phone number and personal address, hence I did not purchase the ".us".
Step 2: Prepare the microSD card for the Pi
Download and install the Raspberry Pi Imager . Plug your microSD card in, and run the Imager. Select the Pi device you are using, select "OS Lite 64-bit" as the operating system (this option might be hidden away in a submenu), and select the correct microSD card.
Click "Next". Edit some configurations, primarily the names and connectivity. Set a name for the Pi ("local name"), a name for the user ("hostname"), and a password. Enter the Wifi credentials, i.e., the wifi name and password. Ensure that SSH is enabled. Go ahead and continue with installing the operating system on to the microSD card.
Once done, plug the microSD card into the Raspberry Pi and connect it to a correct power supply.
If you are using a mini computer or an old computer, install a Linux operating system on it. If you want to stick to this guide as closely as possible, install Debian.
Step 3: Prepare the Pi for Nextcloud
If you are using an external hard drive as the storage media, please format it as ext4 file format. Connect it to the Pi.
While the Pi is powered on, SSH into the Pi. To do this, you can open your terminal on a computer and simply type "ssh your_hostname@locale_name.local" to enter. If you are using an old or mini computer, you can follow all the bottom commands without having to SSH.
Warning: In general, you should not just 'unplug' the Pi to power it off.
It is always recommended that you run sudo shutdown while connected
via SSH to shut the Pi down.
If you are using a Pi, you will have to fix locale issues (assuming you are
in the US). Once you have SSH'ed into the Pi, enter
sudo localectl set-locale LANG=en_US.UTF-8
If you are using an external hard drive as your storage, do the following:
sudo blkid: This showcases all the storages. Your drive will be listed as something like/dev/sdaX. Remember the PARTUUID.sudo mkdir /media/NAME: Replace "NAME" with any name you would want to use for the drive. I named mine "Alexandria", though most people simply do "Nextcloud".sudo nano /etc/fstab: Once in the text editor, add a new line with the following entry:PARTUUID=abcdefgh-00 /media/NAME ext4 defaults,noatime,nofail,x-systemd.device-timeout=10s 0 2. Of course, replace the PARTUID and NAME with the correct ones. Save and exit by pressing CTRL + X, then pressing ENTER.sudo usermod -aG hostname hostname: Replace "hostname" with the correct hostname.-
sudo chown -R hostname /media/NAME: Replace "hostname" and "NAME" with the correct ones. -
sudo restart: This will close SSH and restart the Pi. You are done with configurating the external hard drive. Make sure to SSH back in.
Update and restart the Pi by running
sudo apt-get update && sudo apt-get upgrade && sudo restart
. Once it restarts, SSH back into the Pi.
You can now practically copy and paste the following chunk of code:
    sudo apt-get install ca-certificates curl
    sudo install -m 0755 -d /etc/apt/keyrings
    sudo curl -fsSL https://download.docker.com/linux/debian/gpg -o /etc/apt/keyrings/docker.asc
    sudo chmod a+r /etc/apt/keyrings/docker.asc

    # Add the repository to Apt sources:
    echo \
    "deb [arch=$(dpkg --print-architecture) signed-by=/etc/apt/keyrings/docker.asc] https://download.docker.com/linux/debian \
    $(. /etc/os-release && echo "$VERSION_CODENAME") stable" | \
    sudo tee /etc/apt/sources.list.d/docker.list > /dev/null
    sudo apt-get update
    sudo apt-get install docker-ce docker-ce-cli containerd.io docker-buildx-plugin docker-compose-plugin
    sudo docker run hello-world
    sudo groupadd docker # this might already be done automatically
    sudo usermod -aG docker $USER # adds myself to use docker group
    newgrp docker # refresh users
    docker run hello-world # Test if you can use docker without sudo
    docker rm $(docker ps -qa) # deletes all the hello-world
    docker ps -a # should return nothing
The above code block is taken from the Docker installation guide. If you want to see what all the code does, the full guide to installing docker can be found here.
Step 4: Installing Nextcloud
All of the following in this section is done on the Pi. SSH into the Pi to run the commands. If you use a mini computer or an old computer, run the commands on the computer directly.
I enabled IPv6 protocol on my Pi for future support (more details about this can be found here). To do this, make a new file:
sudo nano /etc/docker/daemon.json # This file did not exist for me; made new
And add the lines
{
    "default-network-opts": {"bridge":{"com.docker.network.enable_ipv6":"true"}}
}
And save and exit by pressing CTRL+X and Enter. Then, run:
sudo systemctl restart docker
sudo docker network inspect nextcloud-aio | grep EnableIPv6
# The above command verifies if it's enabled.
# It's likely not, and in fact, AIO should be missing on a first time setup.
# So run:
sudo docker network create nextcloud-aio
Identify the IP address of the Pi. This can be done by entering
hostname -I. The IP address is typically in the
format of "10.0.0.XX" (IPv4).
Remember this address since it will be needed later.
The following code is taken directly from the Nextcloud AIO. You can see all their guides and documentation here. I used the following code, where "NAME" refers to my harddrive; change it accordingly. You can remove the entire line if you are not using an external hard drive.
sudo docker run \
--init \
--sig-proxy=false \
--name nextcloud-aio-mastercontainer \
--restart always \
--publish 80:80 \
--publish 8080:8080 \
--publish 8443:8443 \
--volume nextcloud_aio_mastercontainer:/mnt/docker-aio-config \
--volume /var/run/docker.sock:/var/run/docker.sock:ro \
--env NEXTCLOUD_DATADIR="/media/NAME" \
ghcr.io/nextcloud-releases/all-in-one:latest
Step 5: Internet Configurations and Finishing Up
Head to your router's configuration page, which can typically be accessed by going to "10.0.0.1" on your browser. There, make the IP address for the Pi (found earlier) to be a "Reserved IP" instead of DHCP. This prevents the local address from changing.
To enable access to the Pi from anywhere in the world (with internet connectivity), ports have to be opened. On the router's configuration page, look for "Port Forwarding" option. Forward the following ports for the Pi:
- 80 TCP
- 443 TCP and UDP
- 3478 TCP and UDP
- 8443 TCP
Note: There are several IP addresses. There are IPv4 addresses that are in the format of X.X.X.X, and IPv6 addresses that are in the format of X:X:X:X:X:X:X:X. Some of these addresses can be local: these are visible only while connected to your router, and is the one that you just found in the above step. There are public IP addresses that can be seen from anywhere in the world: this will be used in the next step.
Next, the domain has to be configured to forward to your Nextcloud. On Porkbun, I had to click on "DNS" to configure. Make a Type "A - Address record" with an answer/value consisting of the public IP address. This can be found by searching "What's my IP?" online. The hostname can be left blank if you want "your_domain.tld" to point to Nextcloud. I used "alexandria.turibiusrozario.com" as the domain, and a TTL value of 3600. This record uses the IPv4 public address. You can additionally add the IPv6 address by creating a Type "AAAA" address record; this will have the same domain name and TTL, but the answer/value will be the IPv6 address (again, you can find this by simply searching "what is my IPv6 address?").
Now, go to "https://10.0.0.X:8080/setup"; replace X with the correct number that points to the Pi. From here, simply follow all the instructions on screen.
Once you reach the page where you can choose your containers, keep in mind that the more containers you enable, the more processing power you will need on your device. I kept all the defaults enabled only. Once you click 'Start', it might take as much as 10 minutes before everything is ready. Then, you can finally go to "https://your_domain.tld" and enjoy NextCloud!
Headtracker with FPV Camera (Prototype)
First-person view (FPV) planes are not as interesting as FPV quadcopters due to model planes' limited mobility. However, a headtracker — a device that tracks the motion of the head — can be utilized to give a more 'real' feel. Below is my prototype headtracker; I utilized this head tracker software on an Arduino Nano BLE with an on-board IMU.
This can be taken further and programmed with INAV or ArduPilot to act as a gimbal. Below was a test gimbal that would keep the orientation of the camera steady during roll and pitch of the drone. This was paired with the headtracker to be able to look up and down while also having the visuals stabilized. I would not recommend this setup, especially with low-quality servos, since the vibrations propagate into the video and there is a high chance of loosing the sense of orientation.
Keyboard Navigation Enhancement
Switching between typing and navigating is time-consuming, since typing requires both hands to be on the keyboard, while navigating requires the right hand to be either on the arrow keys or the mouse. This is especially worse for laptop users.
To reduce the need of switching, I produced a series of scripts that allows the keyboard to be used as a mouse and a number pad. My work is hosted on GitHub here:
Productivity Enhancement Suite by Turibius Rozario .
Active Filament Dryer
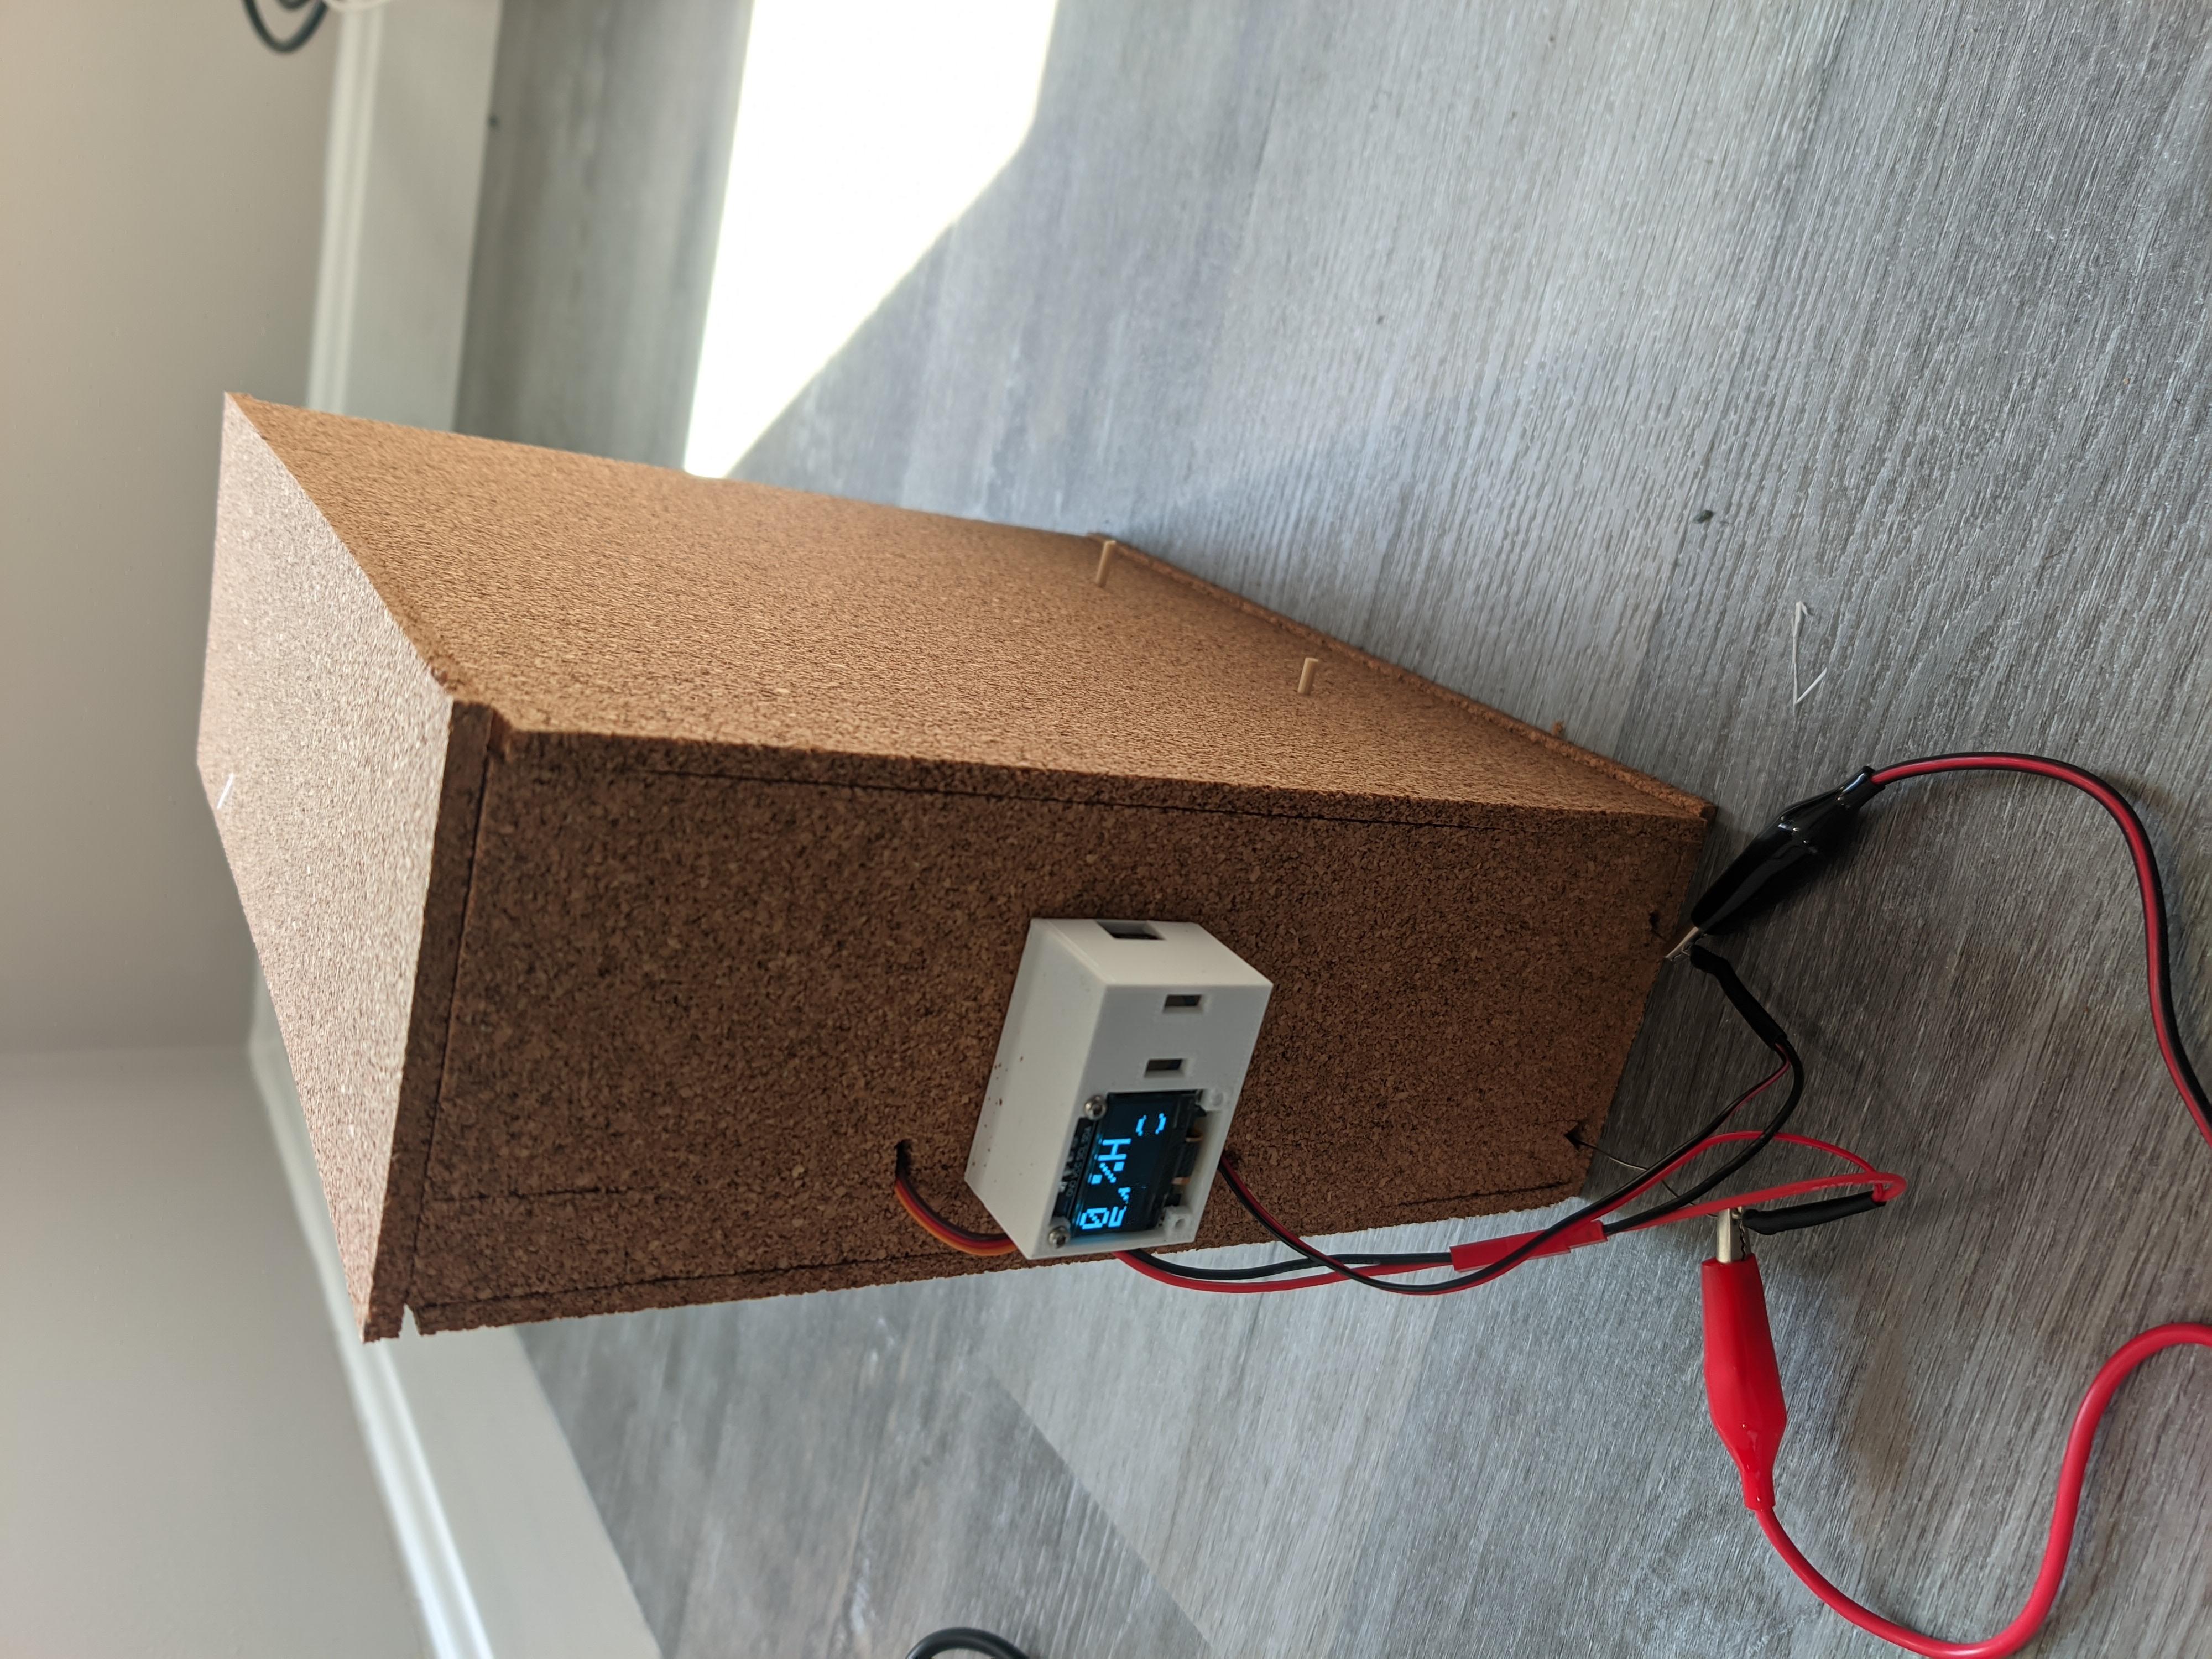 DIY active filmanet dehydrator
Since some of my filaments were sitting out for a long time, I decided to make an active dehydrator. I had some low-cost cork panels lying around. Cork, despite being made from wood, is pretty fire resistant. It also is somewhat insulating. I used cork as the body, held together with some CA (superglue). Two barbecue skewers were placed through the body to prevent the spool from touching the bottom. At the bottom, a 34 inch 22 gauge nichrome wire with a resistance of 1.016 Ohm/ft was used as the heating element. I had to keep it in a wavy shape without having the wires touch each other. For extra safety, I covered the nichrome with some fiberglass cloth to prevent shorts, and high concentrations of heat. The ends of the wire stuck out of the dehydrator.
Outside, alligator clips would supply voltage from a battery charger to heat the wires. An Arduino nano with a DHT11 sensor was used to monitor the temperature and humidity. A 12V 60mm DC fan kept airflow active. The sensors and modules were powered from the same supply as the nichrome wire. This is possible since the Arduino nano accepts 7 to 12V, and the nichrome wire can utilize the same voltage range to output around 20 to 50W. In my uses, 11V was a good starting voltage to heat up the dehumidifier. Once a temperature of 50°C is obtained, I would bring the voltage down to around 9.5V. This would maintain a steady temperature of around 54°C at an ambient temperature of 23°C. The humidity would reach 0% within 3 hours.
If you decide to make this, note that different voltages maybe needed. I was also drying LW PLA which accepts 50°C to 55°C. For filaments such as ABS or PETG, you would have to use higher temperatures. Overall, this worked better than dehydrators that can be bought online, and was also low cost (less than $30, excluding the power supply).
Filament Dry Box
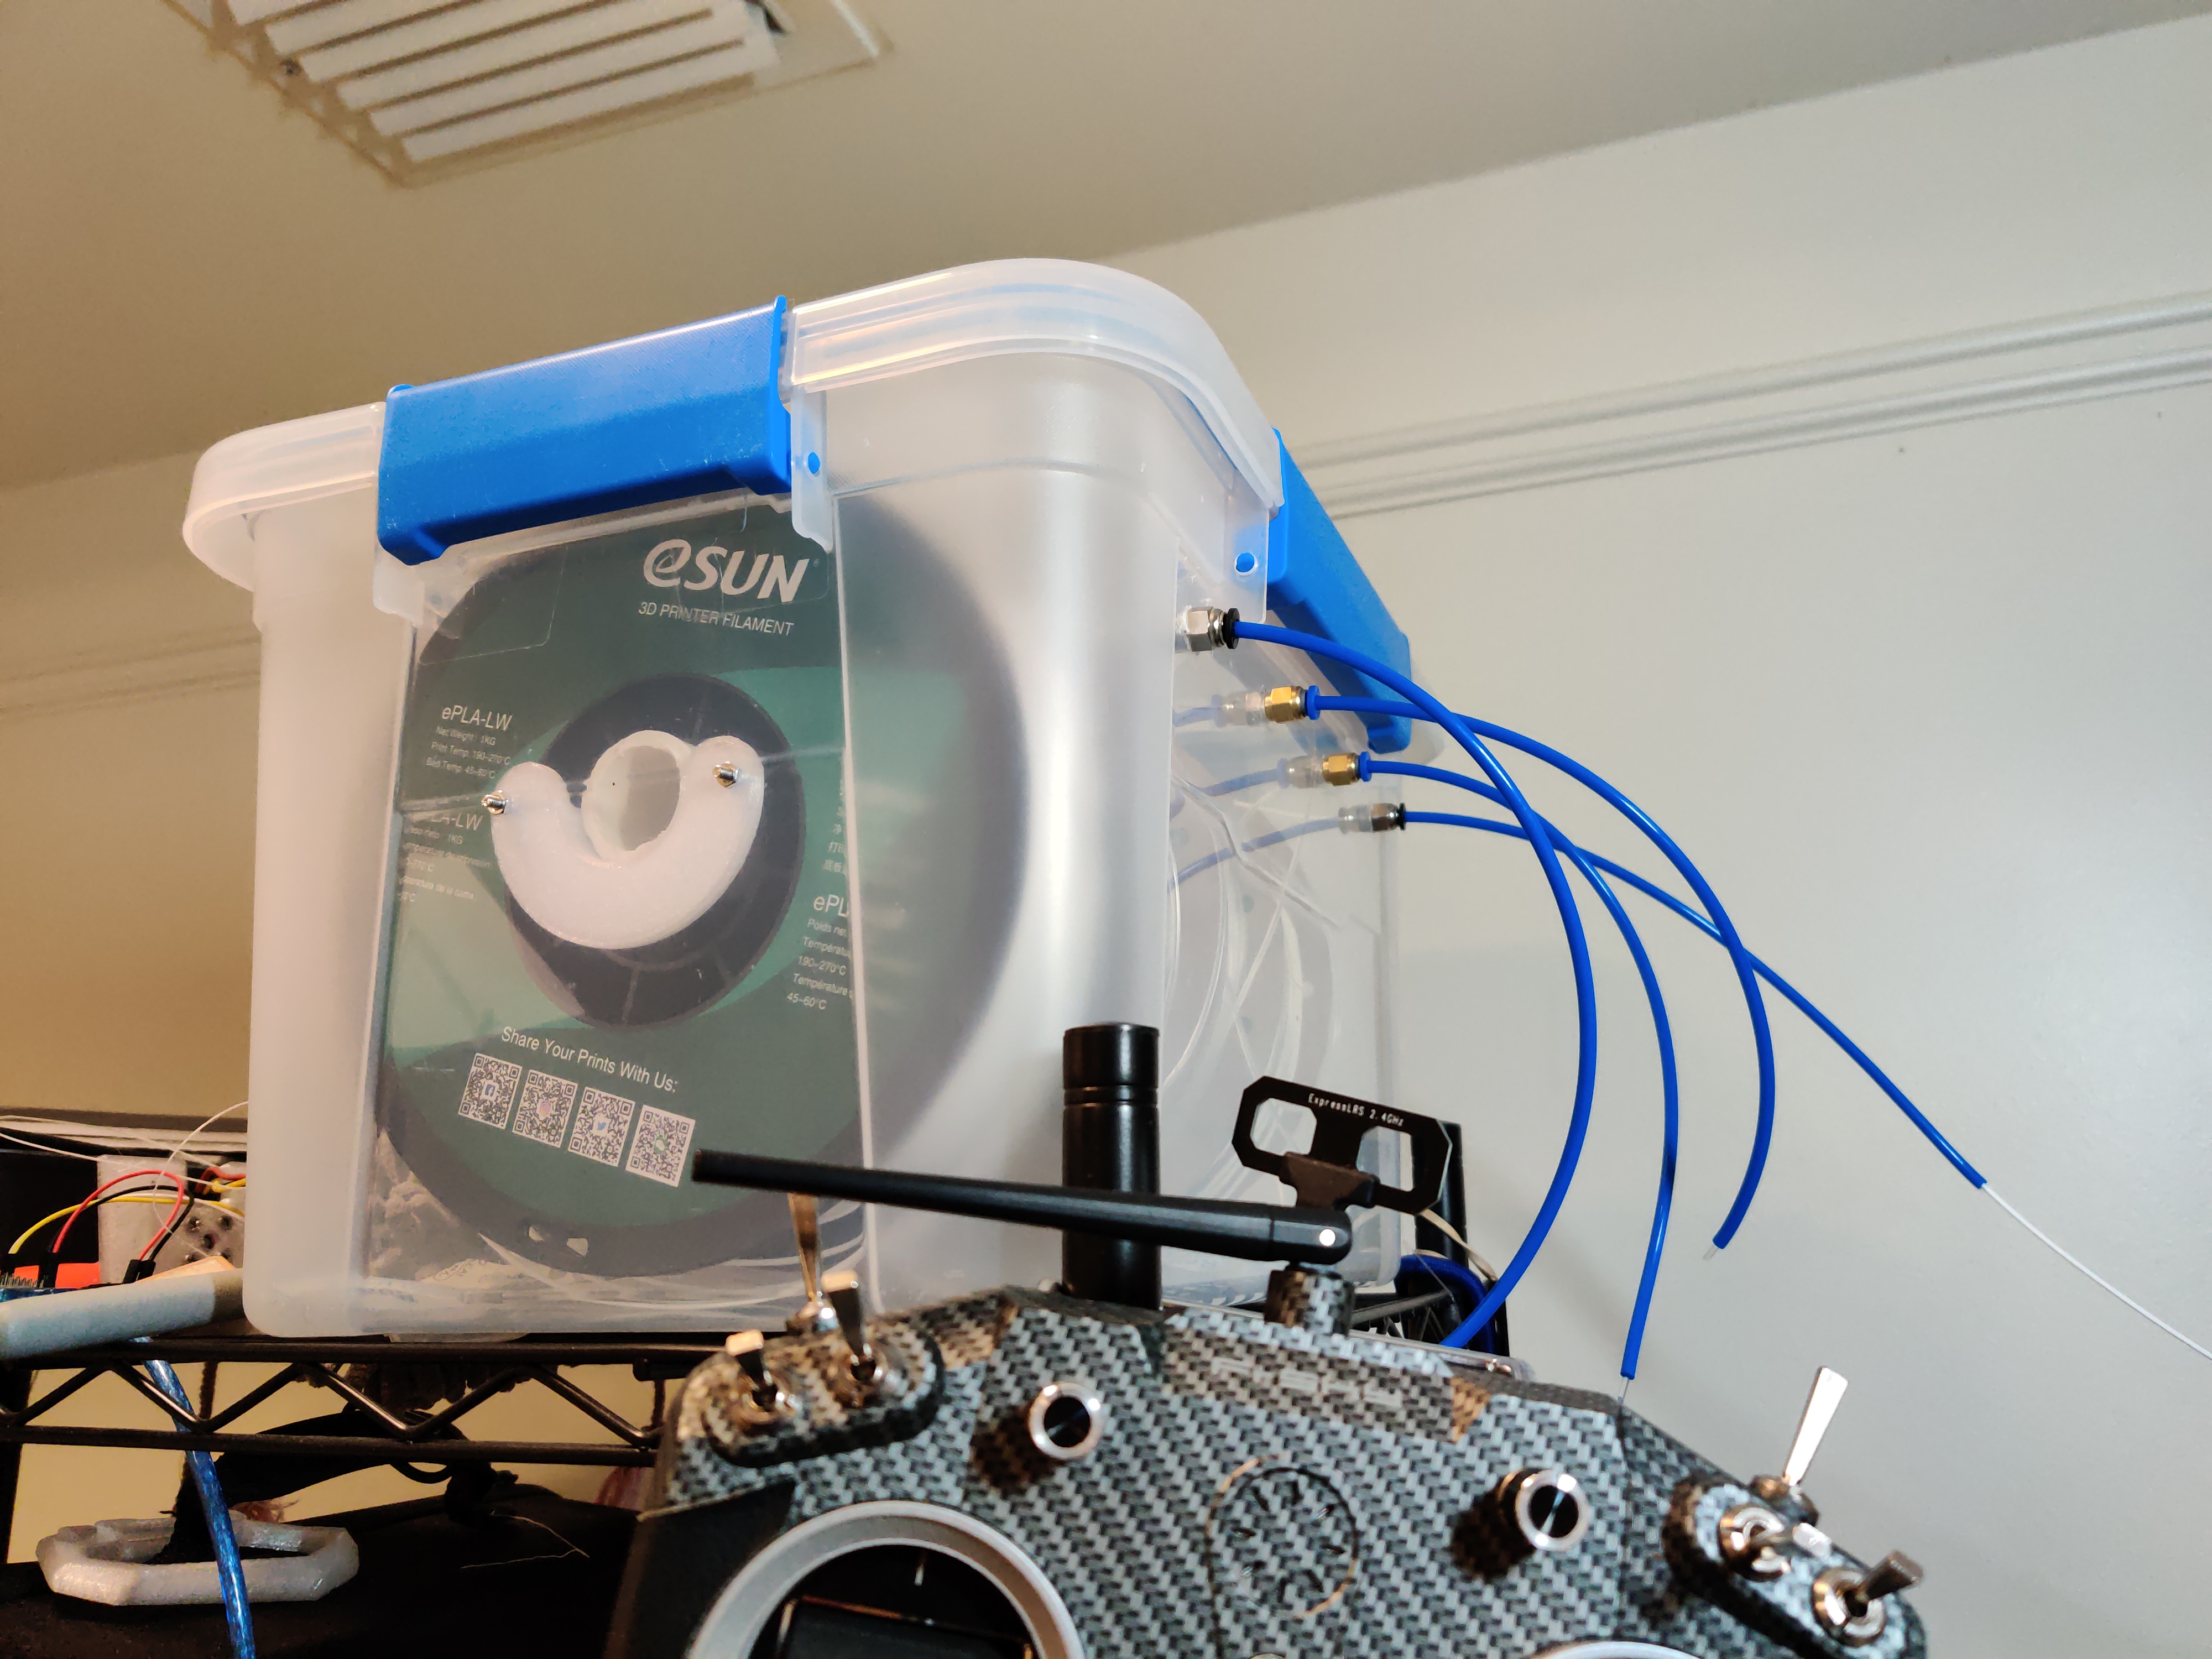 DIY filament dry box containing lightweight LW PLA, PETG, TPU, and PLA+.
Since I print with PETG and sometimes with TPU, and since my room has a humidifier, I decided to create a DIY passive filament dry box, so that the filaments can be quickly changed.
This dry box was made using an 18L waterproof box with a PVC pipe as the spool holder. Nuts and bolts held the 3D printed pipe holder in place, and PTFE tube with coupler was used to reduce moisture going into the box. Silica gel packets were placed inside as a passive dryer.
Overtime, I realized that the PVC pipe did not offer the smoothest rolling, and made replacing spools difficult. I have since then swapped to 608 roller bearings held down by 3D printed holders. The whole dry box was then bolted onto my 3D printer so that the filament can directly feed into the extruders. Wood was used as supports for the plastic.
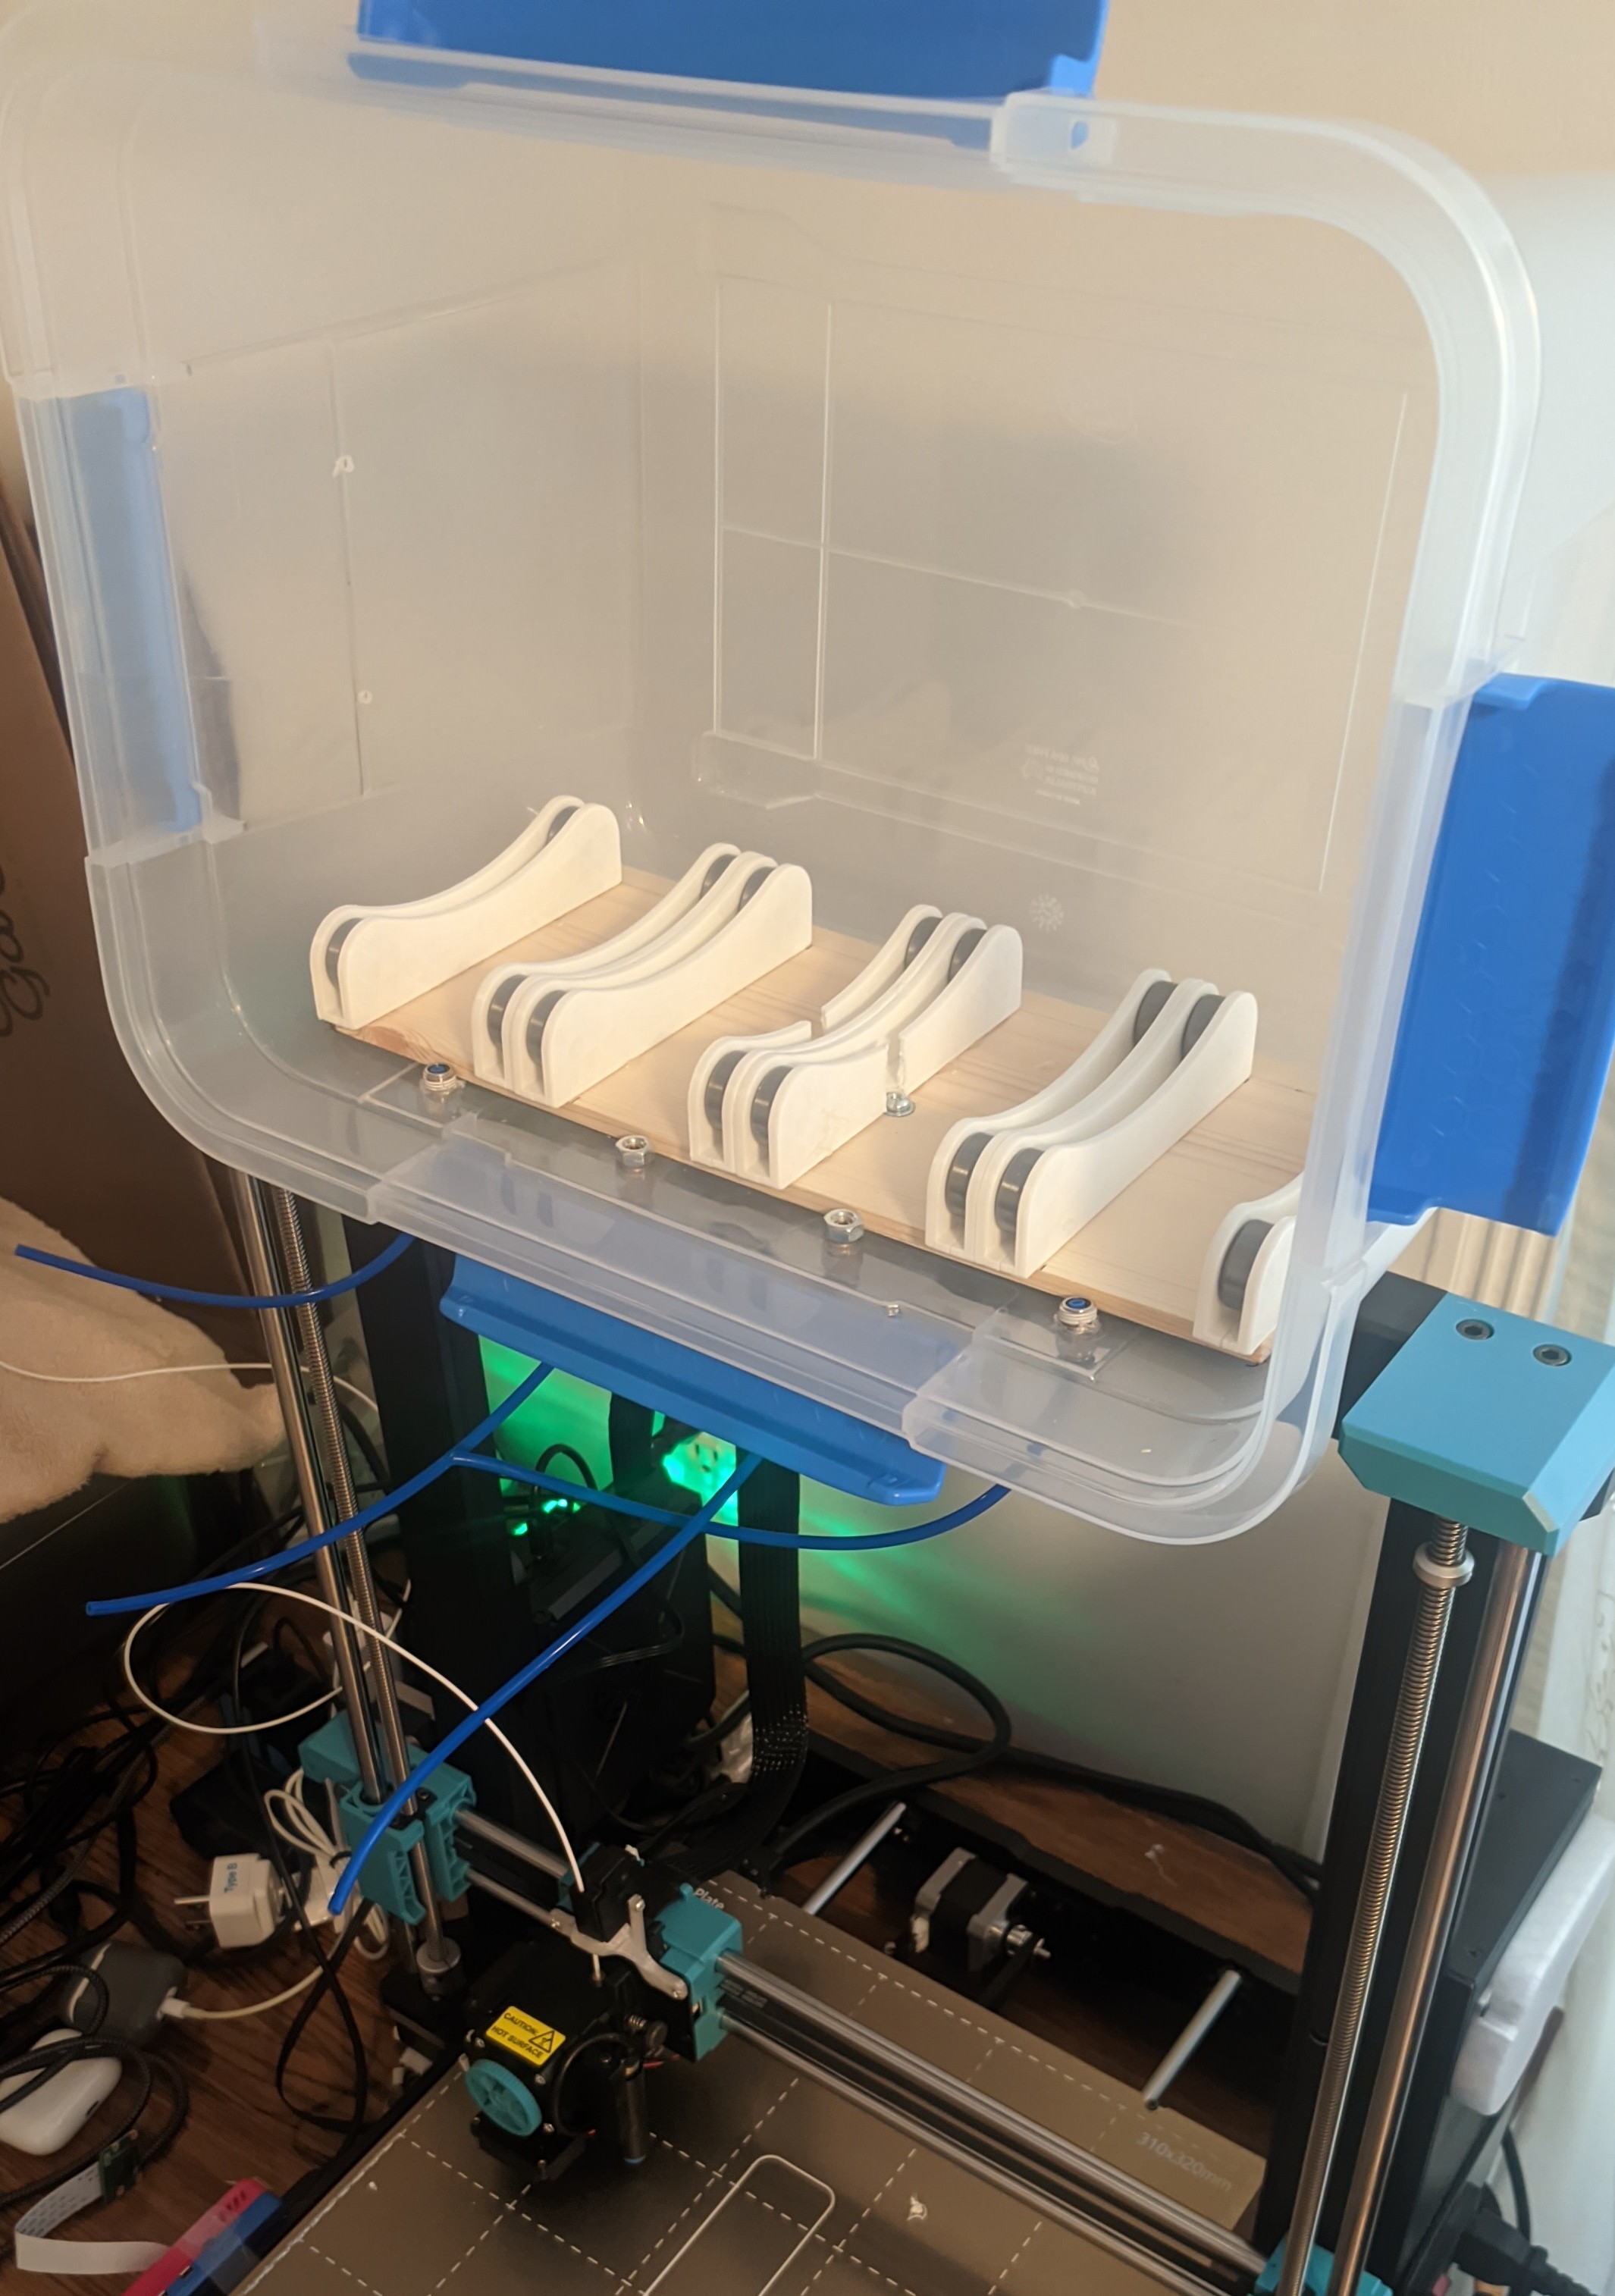 Upgraded filament dry box.
Take Back Your Control: Android
If you use Android, it likely comes with bloatware --- pre-installed apps that you do not use nor need. Worse, there are applications running in the background that constantly degrade battery life --- in particular, almost all of Google services. Worst, the Android that you paid for will not be supported nor last as much as you may want it to.
In search for making my cellphone battery last longer hours, and the phone itself to last more years, I began the journey of 'De-Googling' my phone. This does not mean removing all Google components. To me, it means utilizing as little closed-source and power-hungry applications as possible, which apps made by big tech tend to be. My process was as follows:
- Switching to an open-source OS that does not contain bloatware and major Google backends by default.
- Utilizing open-source or minimal applications.
- Regaining ability to use Google applications.
The very first installation is expected to be the hardest. The process should be the same regardless of what Android you use:
- Backup all files: the easiest method is to directly connect your phone to your computer, and copy all files that you have. I additionally recommend going to each app and exporting any configurations that you may have (e.g. contacts, text messages, authenticator codes, etc.). I also recommend having a list of a list of apps you realistically use so that you can re-download them later.
- Unlocking the bootloader: There are several existing online tutorials for unlocking the bootloader. Here is an example; despite being over 6 years old, the methodology is applicable today. You can use the developer's page to download platform tools which will be needed as you follow along any bootloader unlock video.
- Once unlocked, you can follow your specific device's instructions on how to install LineageOS . However, if you want LineageOS for MicroG, which allows better 'De-Googling' while still being able to use Google applications, you should use the image file (.iso file) from MicroG's website instead of Lineage's .iso file. You will not have to install any additional files using this method.
- After completing the reboot, check out F-Droid and all the interesting things LineageOS for MicroG comes with! You will find many better and ad-free alternatives to certain applications you used to use. Or you can use your backup to regain all your past files and re-download your past apps through Aurora Store (which can be downloaded through F-Droid).
In terms of alternative applications, here are a couple that I enjoy:
- Aegies Authenticator : An open source two-factor authentication application.
- Goodtime - Pomodoro Timer : The F-Droid version has premium services.
- Joplin : Open source note-taking application that you can sync between computers and upload to the cloud.
- KDE Connect : Links your phone to any other computer or phone to perform things such as: file sharing, controlling the other device, sending messages through the other device, audio play/pause depending on phone calls, and more.
- KISS Launcher : Search based launcher to maximize start-ups and increase the rate by which you use your phone
- Organic Maps : Maps that is better than Google Maps for jogging and biking.
- OsmAnd : Google Maps alternative, especially for driving.
- ProtonVPN : Free and one of the top rated VPNs.
- More applications that you can find in AAA's website
Useful Desktop Applications
Speaking of useful applications, here are some applications that I have grown fond of over the years.
Cross-Platform Applications
- Anki (Desktop, Web, Phones): Quizlet on steroids. Ask your friends in medical school if you need any convincing.
- Blender (Desktop): Free and open-source 3D-Modelling tool with a massive community support.
- Briss (Desktop): Allows cropping contents out of .pdf files. Very useful if you need to extract high quality items from these files (e.g. figures from research papers).
- draw.io (Desktop, Web): A very easy-to-use and free diagram making software.
- Element (Desktop, Web, Phones): Basically Discord, but free, open-source, and ridiculously private. This is federated and encrypted, so only you and your recipient have access to messages.
- Firefox (Desktop, Phones): The only major non-Chrome based browser. This is especially important since Firefox supports ad-blocking better and there are numerous add-ons to significantly upgrade performance (such as returning YouTube dislike counts, removing YouTube ads, stronger privacy protection, etc.)
- Inkscape (Desktop): Free and open source vector drawing application. Extremely useful for drawing diagrams, editing PDF files, and vector art.
- Joplin (Desktop, Phone): Minimal yet versatile note taking software with encryption and usability with ANY cloud storage (Google, OneDrive, Nextcloud, personal, etc.). This is similar to Obsidian, but is free and open sourced.
- Kdenlive (Desktop): Easy to use and minimal video-editing software.
Windows-Only Applications
- Chocolatey : Application downloader and manager. Similar to `apt install` on Linux. Extremely useful for multiple downloads and mass updating applications. In fact, many of the applications listed here can be installed via chocolatey.
- Carnac: Shows keys pressed on screen. Useful for doing tutorials.
- Ditto: Stores clipboard history. Allows easy copy-pasting multiple items.
- (Search) Everything: Literally allows searching everything for something, without ANY noticeable loss of computer performance. Highly recommended, especially if you are disorganized.
- Handbrake: Easily change media file formats, trim, compress, etc. Very useful if you make videos and need a smaller file size out of them.
- Image Glass: A much better and faster photo viewer.
- Lively: Live desktop wallpapers. This is similar to steam, except that it is more minimal, supports audio, and you can make CUSTOM wallpapers. FOSS.
- PowerToys: Significantly upgrades functionality of your Windows machine. Adds MANY features ranging from color picker, unit conver sion, math, web and computer search, window tiling, and so so so much more, all done minmally and with few key presses. This is the one item that should be definitely used on a regular basis. FOSS.
- Quicklook: Allows quickly viewing an item WITHOUT opening it. Useful for quickly viewing a pdf document, an image, etc., without opening an application for it.
- ShareX: Screenshot tool with lots of features. Can be a bit too many features for some people.
- SumatraPDF: Very lightweight PDF viewer. FOSS.
- Waifu2x-caffe: Image upscaling and denoising. Useful if you download low quality images and wish it was better quality. FOSS. There is also a web version.
- WinCompose: Allows inserting special character very easily (e.g., I can type ≠ by using alt and = and / in sequence).
- yt-dlp: Command line youtube (and other) downloader. FOSS.
This page was last updated on August 29, 2025.